● Ubuntu Booting USB 만들기
1. 공식 홈페이지에서 Ubuntu LTS (Long Term Support) Version 이미지 파일을 다운받는다.
(LTS Version이 상대적으로 Stable함)
2. Rufus 프로그램을 다운 받는다.
3. Rufus 프로그램을 통해 USB에 다운받은 Ubuntu 이미지 파일을 덮는다.
- 장치에서 USB 확인 -> 부트 유형에서 Image 파일 선택 -> 시작 -> ISO 이미지 모드로 쓰기 -> 예
● Ubuntu 설치하기
1. Ubuntu를 설치할 PC의 전원을 켠 후, Bios Setup에서 Booting 순서를 USB 우선으로 바꾼다.
2. Ubuntu Booting USB를 장착하고, PC를 Booting한다.
3. Process에 따라 Ubuntu를 설치한다.
- [Welecome] : 'Install Ubuntu' 선택
- [Keyboard layout] : 'English' 선택
- [Updates and other software] : 'Normal Installation' 선택
- [Installation type] : 'Someting else' 선택
3-1. Partition을 설정한다.
- '-'를 눌러 모든 Partition 삭제
- 설치할 Drive의 free space를 선택하고 "+" 클릭
1) 가상 RAM Partition
> Size : 4GBB 이상
> Type for the new partition : Primary
> Location for the new partition : Beginning of this space
> Use as : swap area
2) Booting Partition
> Size : 500MB
> Type for the new partition : Primary
> Location for the new partition : Beginning
> Use as : EFI System Partition
3) 설치 Partition 만들기
> Size : Others
> Type for the new partition : Logical
> Location for the new partition : Beginning
> Use as : Ext4 journaling file system
3-2. 나머지 Install을 진행한다.
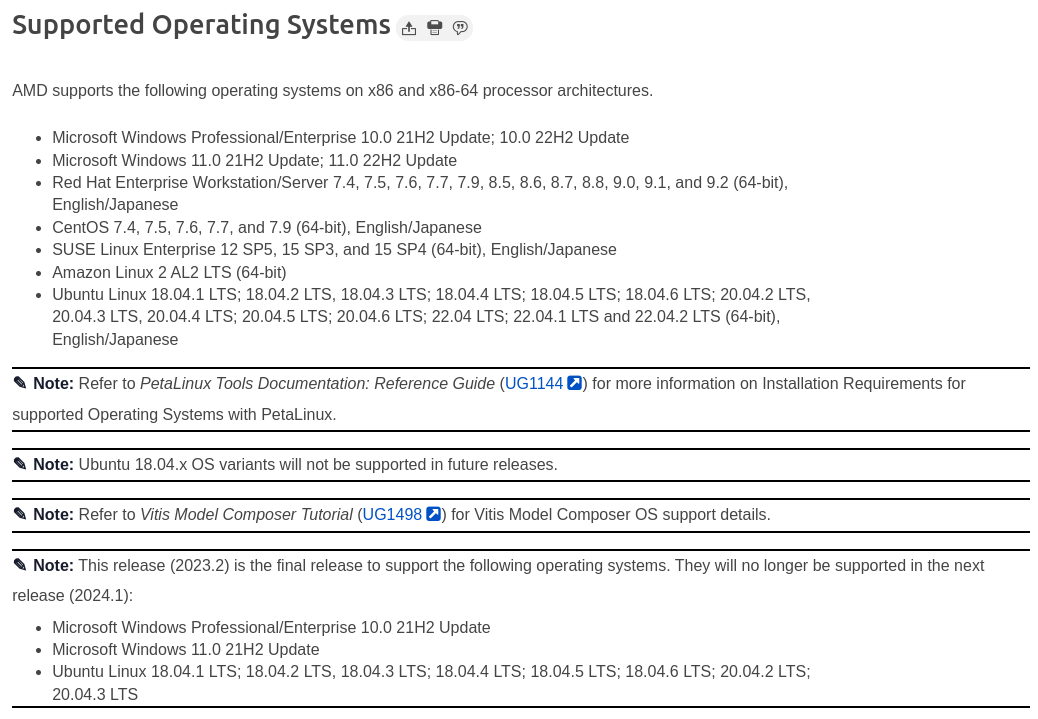
+ 추가) Vivado 2023.02 기준 지원되는 OS Version
'공.돌이 흔적 > Linux.' 카테고리의 다른 글
| [Linux] D2Coding 폰트 기본 폰트로 설정하기 (0) | 2024.05.28 |
|---|---|
| [Linux] crontab과 rsync로 주기적인 Backup 설정하기 (0) | 2024.05.28 |
| [Linux] 외장 드라이브 마운트하기 (0) | 2024.05.28 |
| [Ubuntu] 한글 키보드 설치하기 (0) | 2024.05.28 |
| [Ubuntu] 드라이버 설치하기 (0) | 2024.05.28 |

